How to format an SD card and erase all of its data
If you've ever used an SD card before, you may have been prompted to "format" it before using it. But what does that mean?
Put simply, formatting an SD card erases every single file on it, including internal files that are usually hidden. This is the best way to reset or clear an SD card, and should be the first step you take when using a new card.
Here are four ways to format an SD card, depending on what sort of device you have available.
Important: Formatting an SD card is permanent. Once an SD card is deleted, there's no way to recover the erased files. As such, make sure to back up all the data you want to keep before formatting.
How to format an SD card on a Windows PC
If you use a Windows desktop or laptop computer, you'll use the File Explorer to format your SD card.
Before you get started, back up all the data you want to keep. And if you're on a laptop, make sure it's plugged in or has enough battery to last a little while.
1. Insert your SD card into your computer's SD card reader or an external USB reader.
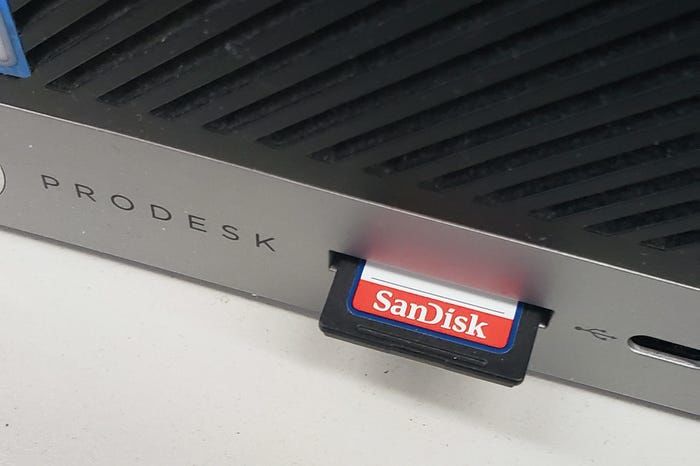 Not all computers will have an SD card reader.
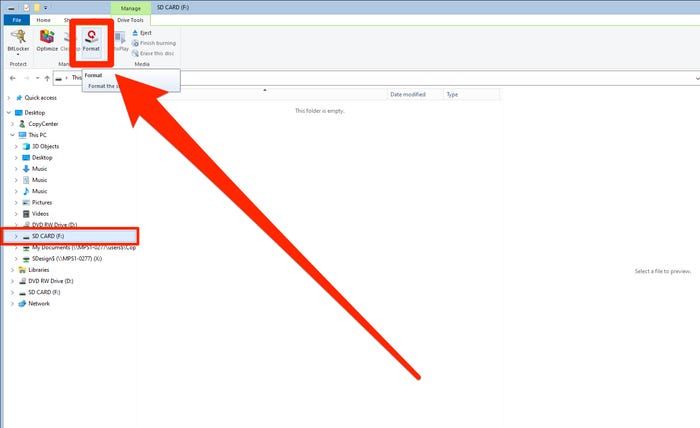
2. Once you've inserted the SD card, open the File Explorer (in other words, open any folder). In the column on the left-hand side, click on either "This PC" or "My Computer" — these serve the same function, but appear under different names in different versions of Windows.
3. Click on the SD card in the device list. This will open it on your computer.
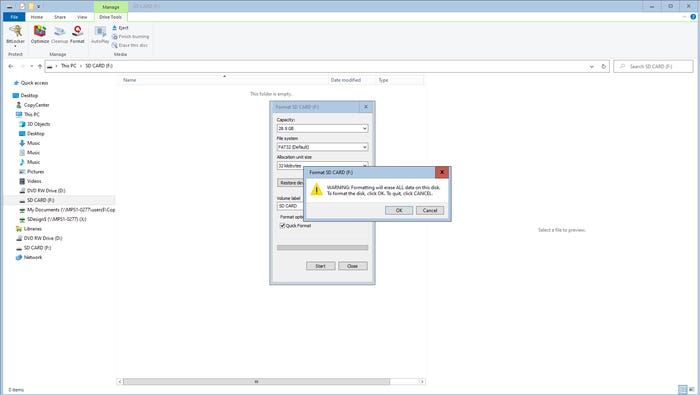
4. At the top of the File Explorer window, click the tab labeled "Manage," then click "Format." A pop-up window will appear.
5. In the pop-up window, click on the drop-down menu underneath "File System." Here, you'll see a few options — if you only plan to use this card on Windows computers, pick "NFTS." If you're going to use it on multiple kinds of devices, click "FAT32."
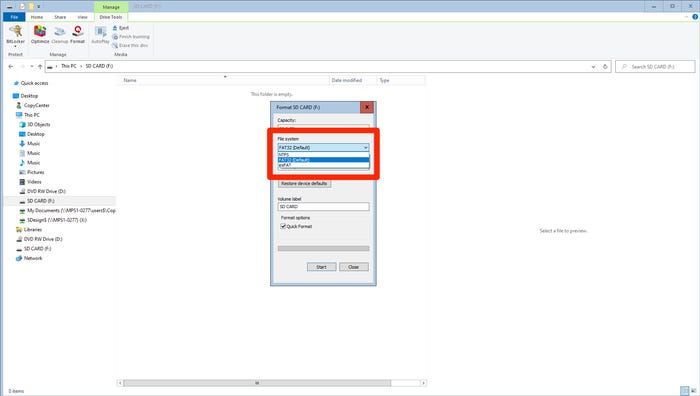 FAT32 is usually the best format to pick.
6. If you're formatting the SD card for the very first time, make sure that the checkbox next to "Quick Format" remains unchecked. If you've formatted this particular SD card before, the Quick Format checkbox can remain checked.
7. When you're ready to start formatting, click "Start."
8. One or two more pop-up windows will appear. Click "OK" in each of these to proceed.
 Click "OK" to reassure Windows that you know exactly what you're doing.
9. Once the process is done, you can eject the SD card and then remove it from your SD card reader.
How to format an SD card on a Mac
On a Mac, you'll use the Finder to format your SD card. Make sure you've backed up and saved any data you want to keep from the card, and if you're using a laptop, plugged it in.
1. If you haven't already done so, insert the SD card into your Mac's SD card slot or USB card reader and boot up the computer.
2. Open "Finder," then click on the "Go" tab. In its sub-menu, click "Utilities."
3. In the window that appears, double-click on "Disk Utility." A new window will open.
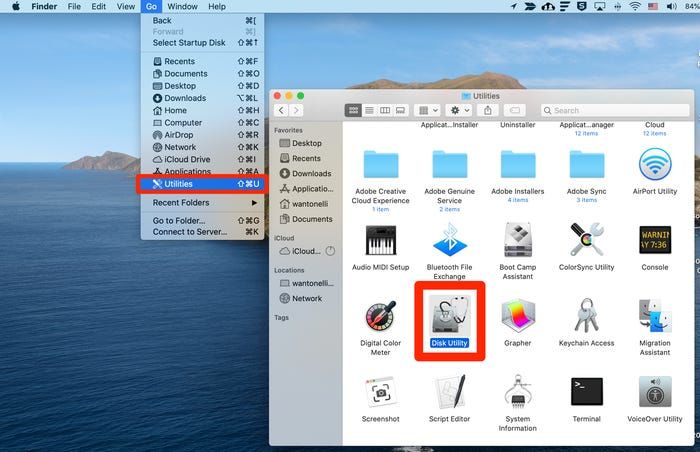 Open the Disk Utility app.
4. In the left-side column, click on the SD card. It should appear underneath the "External" header.
5. In the upper portion of the window, click the button labeled "Erase."
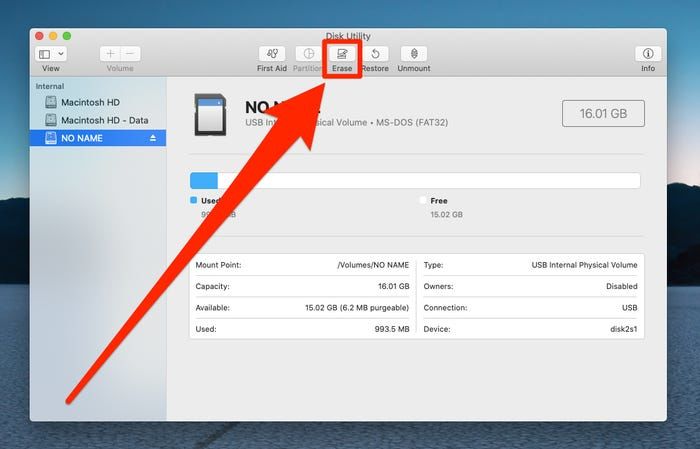 You can format an SD card from the Disk Utility app on your Mac.
6. Click "Format" to open a drop-down menu. If your SD card is 64 GB or larger, pick "ExFAT." If it's 32 GB or smaller, pick "MS-DOS (FAT)."
7. Click "Erase" to format the SD card.
How to format an SD card on an Android device
It might come as a surprise, but many Android phones and tablets can format SD cards too. In fact, a lot of Androids come with a microSD card included.
Once you've backed up the data you want to save and charged your Android, here's how to format a card.
1. With the SD card inserted into your Android device, open "Settings."
2. Tap on "Device care."
3. Tap on "Storage," then tap on "Advanced."
4. Look for your SD card underneath the "Portable storage" header. Once you locate the SD card, tap on it.
5. Tap on "Format." In the pop-up that appears, tap on "Format SD card."
How to format an SD card using a DSLR camera
If you have a DSLR camera, there's a good chance that you can format the SD card directly on the camera itself. Keep in mind that the specific steps will vary depending on the type of camera you have, but this guide covers the general process.
Again, make sure the camera is charged, and that you've backed up any files you want to save.
1. With the camera turned off, insert the SD card into its designated slot. Once the SD card is secure, turn the camera on.
2. Using either a button or an option on your camera's screen, open the menu.
3. From the menu, access "Setup." Look for an option that includes the word "format." Once you've located it, select this option.
4. Select "OK" to begin the formatting process. Wait patiently while it does so, because it can take a few minutes.
5. Once the SD card finishes formatting, turn the camera off to complete the process.
What to do if your SD card won't format
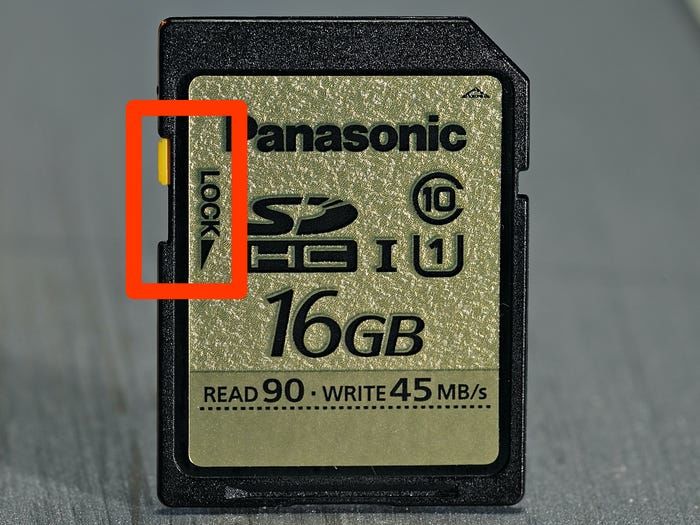
When you place your SD card into the reader, there's a chance that the device won't read it. If this happens, there's a good chance that the write-protect switch is flipped on.
This switch makes it so nothing on the SD card can be changed. It's good for protecting your data, but bad if you want to format.
To turn it off, simply take the SD card out of the reader and push the switch up towards the end that's inserted into the computer or card reader.