How to resize an image on your iPhone in 2 different ways
You can also use your Photos app to brighten or darken the image, crop the picture, and more.
One of these many tools includes the ability to resize or crop your photos, using your built-in Photos app, or another that you download from the App Store.
Here's how to do both, and resize your iPhone images however you like.
How to resize an image on an iPhone in Photos
It's possible to resize an image in the Photos app, with a variety of common dimensions available through the "Edit" menu.
1. Open the Photos app on your iPhone and the picture that you want to resize.
2. Tap Edit in the top right corner of the screen.
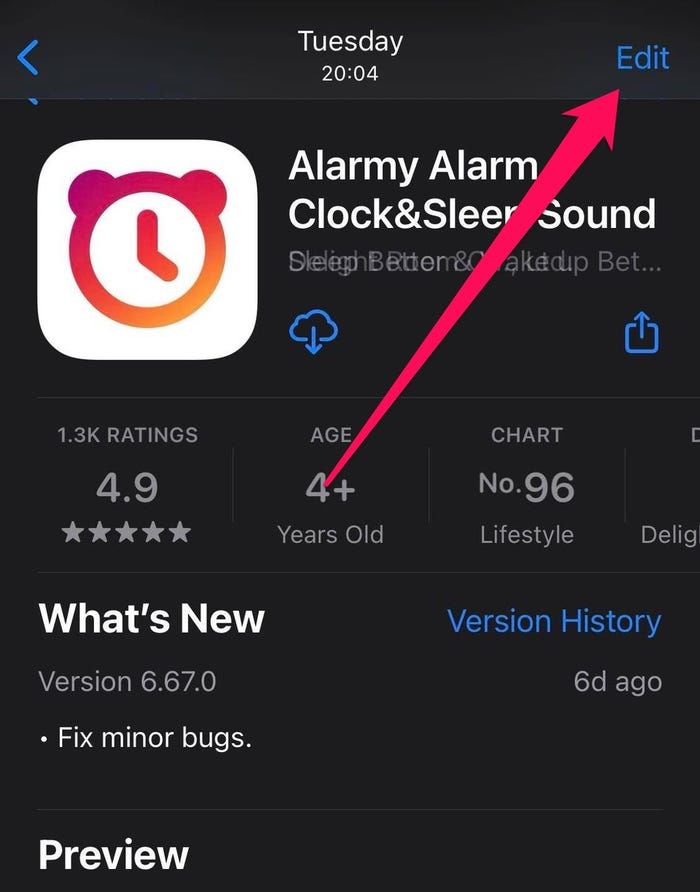 Tap "Edit" in the upper right corner.
3. A new menu will open up, with a variety of editing tools. You'll want to tap the Crop icon at the bottom of the screen — it looks like two right angles intersecting.
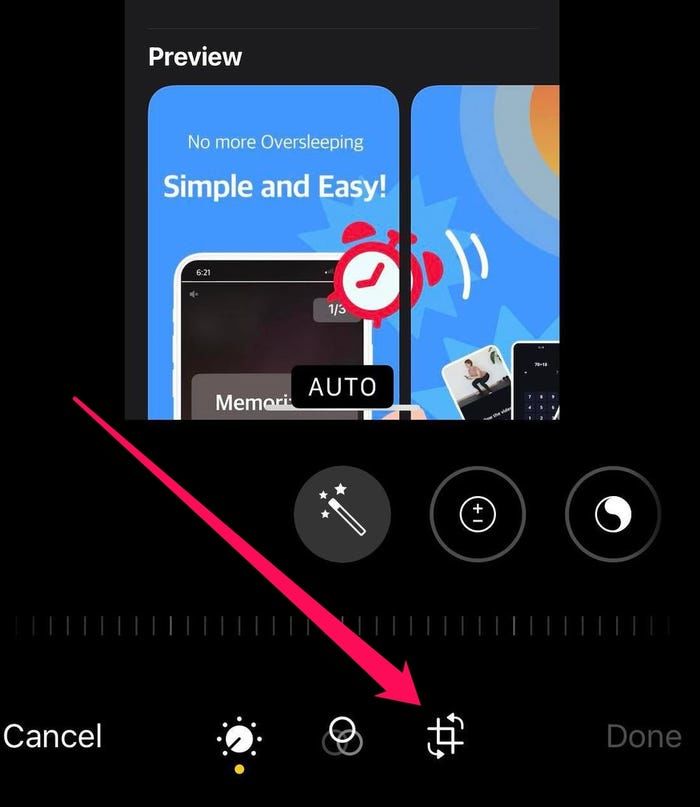 Tap the "Crop" icon at the bottom.
4. Tap the gray square icon in the top right part of the screen.
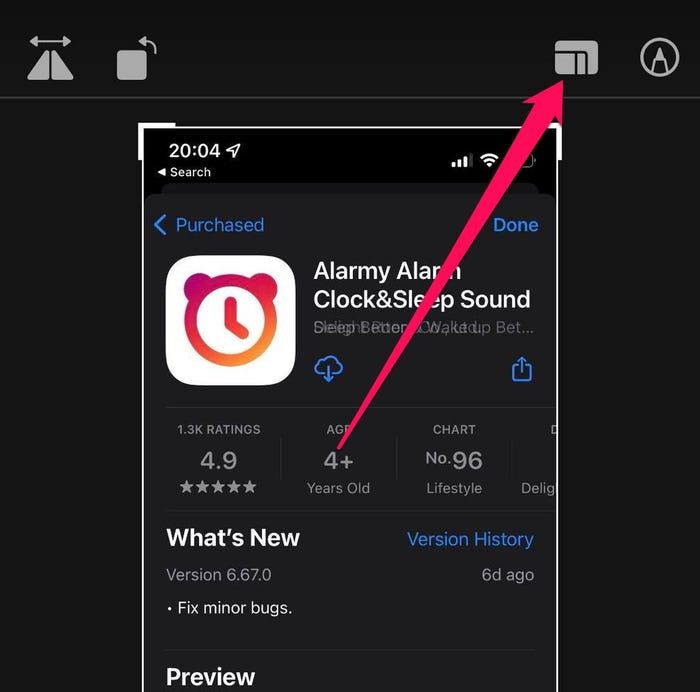 Tap this icon that looks like a gray square.
5. You're now in the dimension editing menu. At the bottom of the screen, you'll find a number of options.
 You can change the picture's size in the dimensions editing menu.
* Original: Reverts your image to its original dimensions.
* Freeform: Lets you crop the image however you'd like, by dragging your fingers from the sides of the image inward.
* Square: Cuts off the sides of your image so it can fit into a square.
After the Square option, there are a number of preset length-and-height ratios. When you tap one, the dimensions will change immediately.
6. When you're finished resizing the picture, tap Done to save your changes.
While all of these built-in iPhone image editing tools are decent, they can't change the image's resolution.
To ensure a given picture is the resolution you want, you'll need a third-party photo editing app.
How to resize an image on an iPhone using Image Size
Image Size is one of the best iPhone photo-resizing apps. As long as you're willing to view the occasional ad, it's totally free.
Once you install the Image Size app, here's how to use it:
1. Open the Image Size app on your iPhone.
2. Tap the photo icon in the top left part of the app screen – it looks like a mountain inside a box.
 Tap the photo icon in Image Size to start resizing the photo.
3. Grant the app access to your photos by tapping Allow Access to All Photos.
4. Tap the photo you want to resize in your Photos library.
5. Tap Choose in the bottom right corner.
Quick tip: You can also select the measurement format you wish to work with (from pixels to millimeters to inches).
 You can change the measurements you want to work with.
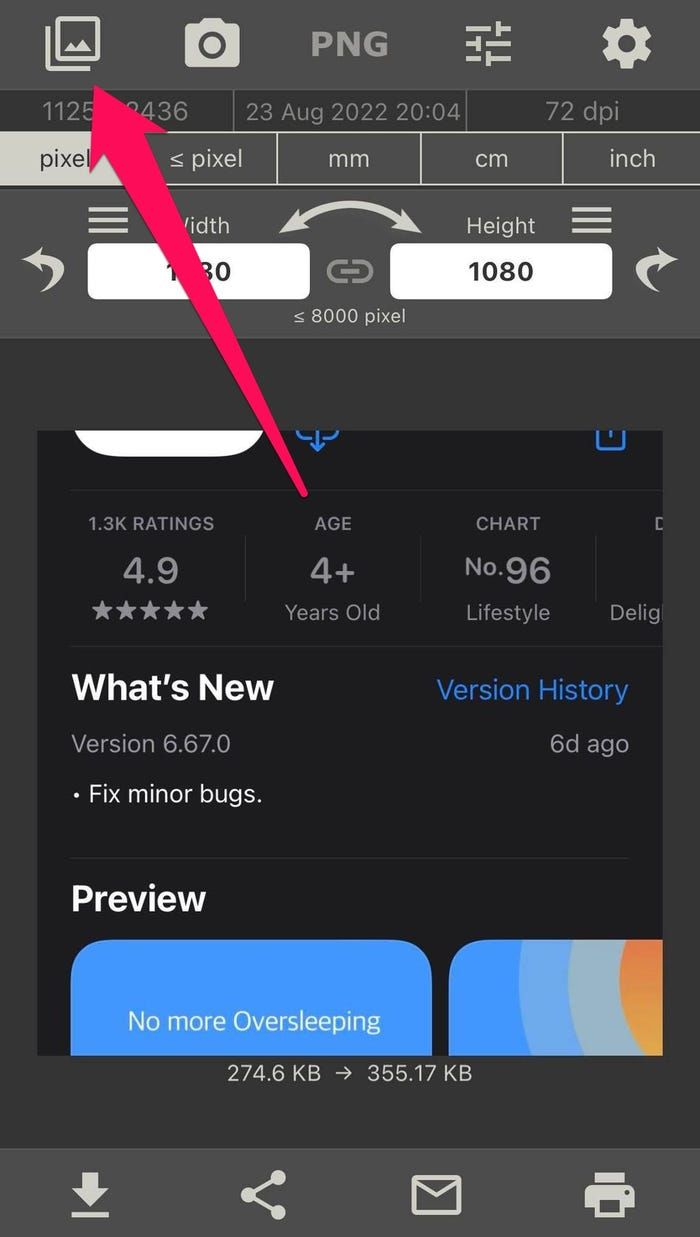
6. Enter the new size values of the picture in the Width and Height text boxes – you'll see the new size of the image displayed at the bottom of the screen.
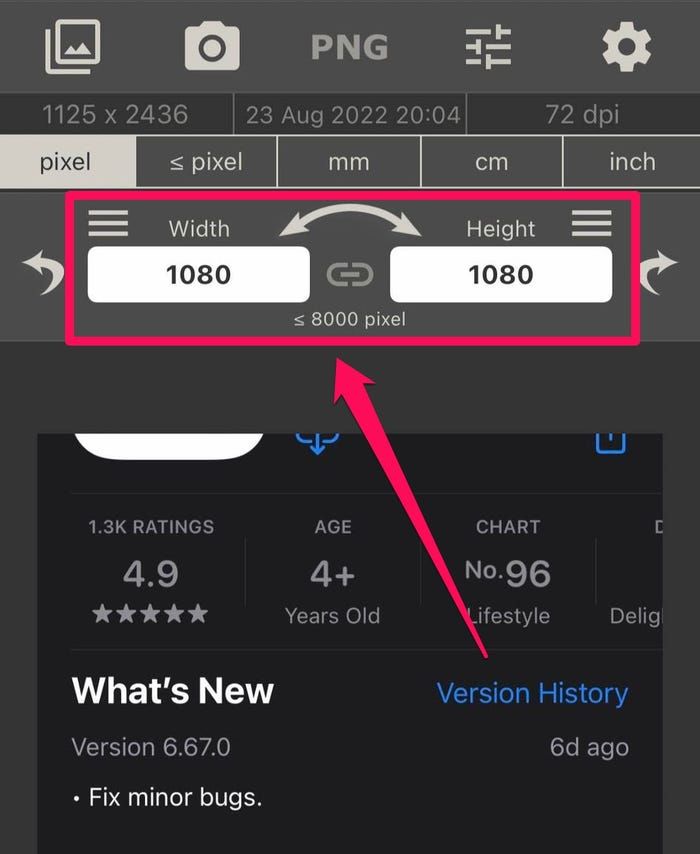 Image Size allows you to control both the horizontal and vertical size of a photo.
 Note: There's a maximum width and height allowed. You can see this below the Width and Height text boxes – it will be something like ≤ 8000.
7. Once you are happy with your picture's shape and file size (and you have made any other edits within the app), tap the download icon – the arrow facing down to a line – in the bottom left corner of the app to save the resized image back to your Camera Roll.
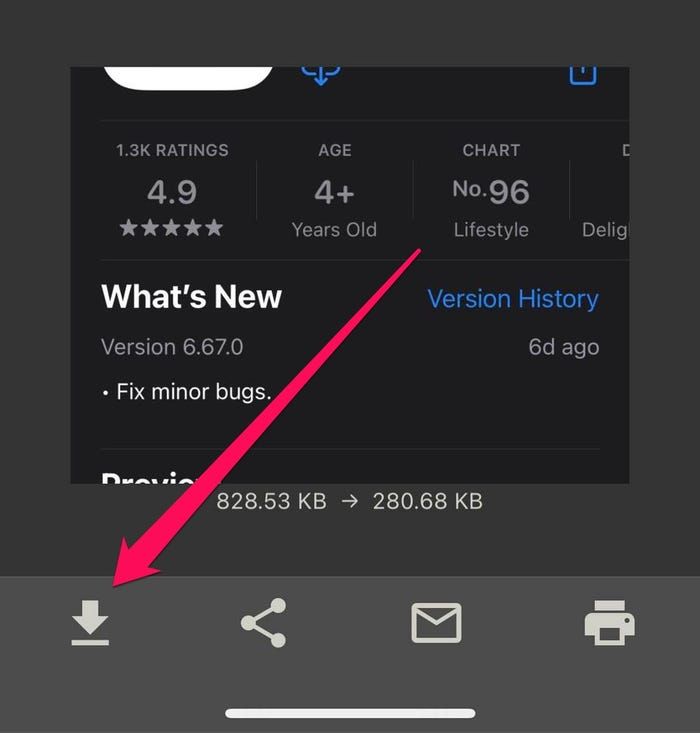 Tap the download icon when you're done resizing the picture to save it to your Camera Roll.
 How to reduce image size on iPhone
When you reduce the photo's resolution using an app like Image Size, you'll effectively reduce its size as well.
In Image Size, you can see the size reduction by looking at the figure below the picture in the photo editing area.